

How to ground a control cable?
Dec 10, 2025
Leave a message
Hey there! I'm working with a control cable supply company, and I often get asked about how to ground a control cable. Grounding is super important in electrical systems, and it's a crucial step for the safety and proper functioning of control cables. So, I thought I'd share some insights on this topic in today's blog.
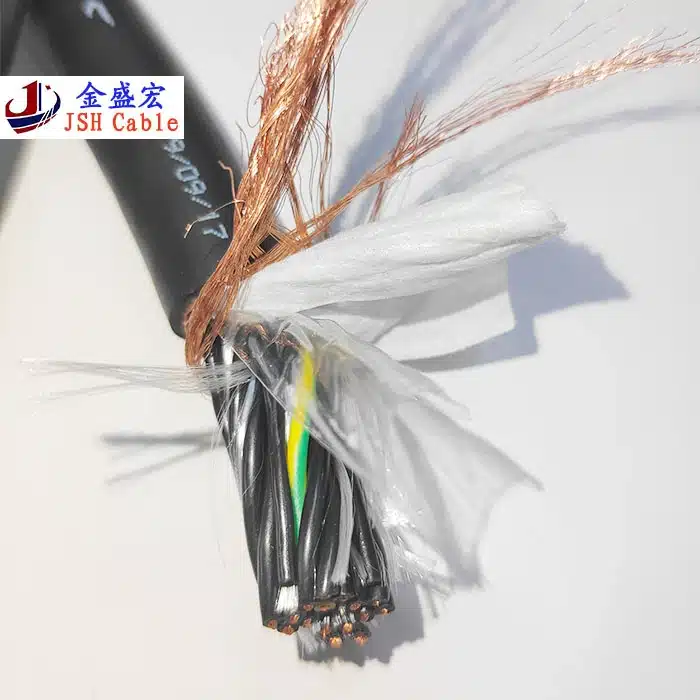

First off, let's talk about why grounding a control cable is so important. Grounding serves as a safety measure by providing a low - resistance path for electrical current in case of a fault. In a control cable system, this means that if there's a short circuit or an unintended electrical discharge, the excess current can flow safely to the ground instead of damaging equipment or causing harm to people. Besides safety, grounding can also help in reducing electrical noise and interference, which is especially important for control cables as they often carry sensitive signals.
Now, let's get into the nitty - gritty of how to ground a control cable. The first thing you'll need is the right tools and materials. You'll need a grounding conductor, which is usually a copper wire. The size of the grounding conductor depends on the size of the control cable and the electrical load it's expected to carry. A general rule of thumb is that the grounding conductor should have a cross - sectional area that's at least half the size of the largest conductor in the control cable.
You'll also need a grounding electrode. This can be a metal rod driven into the ground, a metal water pipe, or a grounding plate buried in the soil. The grounding electrode needs to have good contact with the earth to ensure that the excess current can be safely dissipated.
The first step in grounding a control cable is to identify the grounding conductor within the cable. In most control cables, there's a dedicated grounding conductor, often colored green or green with a yellow stripe. If your cable doesn't have a dedicated grounding conductor, you'll need to add one.
Once you've identified or added the grounding conductor, you need to connect it to the grounding electrode. This is done using a grounding connector. There are different types of grounding connectors available, such as crimp connectors, solder connectors, and bolt - on connectors. The choice of connector depends on the type of cable and the grounding electrode you're using.
When using a crimp connector, you'll need to strip the insulation from the end of the grounding conductor and insert it into the crimp connector. Then, use a crimping tool to compress the connector onto the conductor. Make sure the crimp is tight and secure to ensure good electrical contact.
If you're using a solder connector, you'll need to heat the connector with a soldering iron and apply solder to the joint between the grounding conductor and the connector. This method provides a very good electrical connection, but it requires some skill and practice.
Bolt - on connectors are often used when connecting the grounding conductor to a metal grounding electrode. You'll need to drill a hole in the grounding electrode if there isn't one already, insert the grounding conductor through the hole, and then use a nut and bolt to secure the connector in place.
After connecting the grounding conductor to the grounding electrode, it's important to test the grounding connection. You can use a grounding resistance tester to measure the resistance between the grounding conductor and the earth. The resistance should be as low as possible, typically less than 5 ohms. If the resistance is too high, there may be a problem with the grounding electrode or the connection.
Another important aspect of grounding a control cable is to ensure proper earthing throughout the entire electrical system. This means that all electrical equipment connected to the control cable should also be properly grounded. This can be done by connecting the equipment's grounding terminal to the same grounding electrode or to a common grounding bus.
Now, let's talk a bit about the different types of control cables available and how grounding might vary for them. For example, a Cross Linked Polyethylene Insulated Aluminum Core Power Cable is designed for specific applications where the advantages of cross - linked polyethylene insulation and aluminum cores are needed. When grounding this type of cable, you'll still follow the general steps of identifying the grounding conductor, connecting it to the grounding electrode, and testing the connection. However, you may need to be more careful with the aluminum core, as aluminum can react with other metals and cause corrosion if not properly protected.
On the other hand, a Flexible Drag Chain Cable is used in applications where the cable needs to move continuously, such as in machine tools or automated conveyors. Grounding this type of cable requires special considerations, as the cable's flexibility can cause the grounding conductor to break or become loose over time. You may need to use a more flexible grounding conductor and secure it properly within the cable to prevent damage.
In conclusion, grounding a control cable is a crucial process that requires careful attention to detail. By following the right steps, using the proper tools and materials, and testing the connection, you can ensure the safety and proper functioning of your control cable system.
If you're in the market for control cables or have any questions about grounding or other aspects of control cable installation, don't hesitate to reach out. We're here to help you find the right solutions for your needs and ensure that your electrical systems are safe and reliable. Whether you need a simple control cable for a small project or a complex cable system for a large industrial application, we've got you covered.
References
- Electrical Wiring Handbook, 19th Edition
- National Electrical Code (NEC)
Send Inquiry