

How to install EPDM Insulation power cable?
Oct 21, 2025
Leave a message
Hey there! As a supplier of EPDM Insulation power cables, I'm super excited to share with you how to install these cables. EPDM, or Ethylene Propylene Diene Monomer, is a synthetic rubber known for its excellent electrical insulation properties, weather resistance, and flexibility. These features make EPDM Insulation power cables a top - choice for various applications, from industrial settings to outdoor installations.
Pre - installation Preparation
Before you start installing the EPDM Insulation power cable, there are a few things you need to do. First off, you gotta check the cable thoroughly. Look for any visible damage like cuts, abrasions, or kinks. If you find any, it's best not to use that cable as it can lead to electrical issues down the line.
Next, measure the length of the cable you need. It's always a good idea to add a little extra length, say about 5 - 10% more than what you initially calculated. This gives you some wiggle room in case you make a mistake during the installation or need to make adjustments later.
You'll also need to gather the right tools. You'll need a cable cutter, a wire stripper, a screwdriver (both flat - head and Phillips - head), and some electrical tape. If you're working on a larger project, you might also need a cable pulling machine.
Route Planning
Planning the route for your EPDM Insulation power cable is crucial. You want to avoid areas where the cable could be exposed to sharp objects, excessive heat, or chemicals. For outdoor installations, make sure the cable is routed away from areas prone to flooding.
If you're running the cable through walls or floors, use cable trays or conduits. These not only protect the cable but also make it easier to manage and maintain. When passing through walls, drill holes that are slightly larger than the cable diameter to prevent any damage to the insulation.
Cable Uncoiling
When you're ready to start uncoiling the cable, do it carefully. Uncoil the cable in a large, open area to prevent it from getting tangled. If the cable has been coiled for a long time, it might have a bit of a curl. You can straighten it out by gently pulling on the cable in a straight line.

Cable Termination
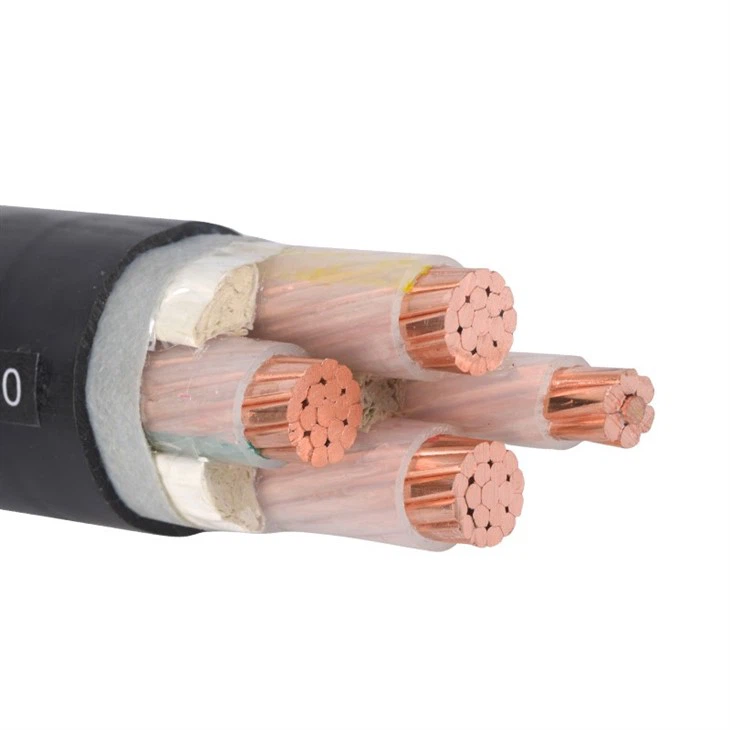
Now, let's talk about cable termination. This is where you connect the cable to the electrical equipment. First, use the wire stripper to remove the outer insulation of the cable. Be careful not to cut into the inner conductors. The length of the insulation you remove depends on the type of termination you're doing, but usually, it's around 3 - 5 inches.
Once the outer insulation is removed, you'll see the individual conductors. Strip the insulation from the ends of these conductors as well. Make sure the exposed conductor is clean and free of any debris.
For connecting the conductors to the equipment, you can use crimp connectors or soldering. If you're using crimp connectors, use a crimping tool to secure the connector to the conductor. Make sure the connection is tight and there's no loose wire. If you're soldering, heat the joint with a soldering iron and apply solder until it flows evenly around the connection.
After making the connection, cover it with electrical tape or a heat - shrink tube. This provides additional insulation and protection.
Cable Jointing
In some cases, you might need to join two sections of EPDM Insulation power cable together. This is called cable jointing. There are different methods for cable jointing, but one of the most common is the cold - shrink jointing method.
First, clean the ends of the cables to be joined. Remove the outer insulation and the inner insulation from the conductors. Align the conductors of the two cables and connect them using a suitable connector.
Then, slide the cold - shrink joint kit over the joint. The cold - shrink kit is pre - expanded and will shrink onto the joint when you remove the supporting core. Make sure the kit covers the entire joint area and provides a good seal.
Testing
Once the installation is complete, it's time to test the cable. Use a megger to test the insulation resistance of the cable. A good insulation resistance value indicates that the cable is properly installed and there are no insulation issues.
You should also test the continuity of the conductors. This ensures that there are no breaks in the electrical path. If the tests show any problems, go back and check the installation to find and fix the issue.
Safety Precautions
Throughout the installation process, safety should be your top priority. Always wear appropriate safety gear, such as safety glasses, gloves, and hard hats. Make sure the power is turned off before you start working on the cable to avoid electrical shocks.
If you're working at heights, use proper fall - protection equipment. And when using tools, follow the manufacturer's instructions carefully.
Related Products
If you're interested in other types of power cables, we also offer Welding Machine Cable YH Cable, XLPE Insulated Power Cable, and YJV YJV22 YJV32 Low Voltage Copper. These cables have their own unique features and applications, so feel free to check them out.
Conclusion
Installing EPDM Insulation power cables might seem a bit daunting at first, but if you follow these steps and take the necessary precautions, you can do it successfully. Whether you're a DIY enthusiast or a professional electrician, proper installation is key to ensuring the safety and performance of the cable.
If you're in the market for EPDM Insulation power cables or have any questions about the installation process, don't hesitate to reach out. We're here to help you with all your power cable needs. Let's get in touch and start discussing your project!
References
- Electrical Installation Handbook, Schneider Electric
- Power Cable Engineering, John W. McDonald
Send Inquiry